Interface
Interface
Depending on whether you use Nozbe individually or with a team, and how you get started, you’ll see one space on the left side and you’ll see between 2 and 6 tiles pinned by default. You can customize your Nozbe layout, add some new tiles and remove others to make Nozbe your perfect app, where everything is close at hand. Anything you unpin will still be available under “More” at the bottom of the sidebar.
New Space
Hitting “Create a New Space” will set up your space with the default interface, while choosing “Create a Personal Space” will enable the simplified two tiles interface in it.
💡 Hint: If you select the “Personal use” option, and later on decide that you want to use that space to work with your team, Nozbe will automatically switch the interface to the default one when you invite your first space member.
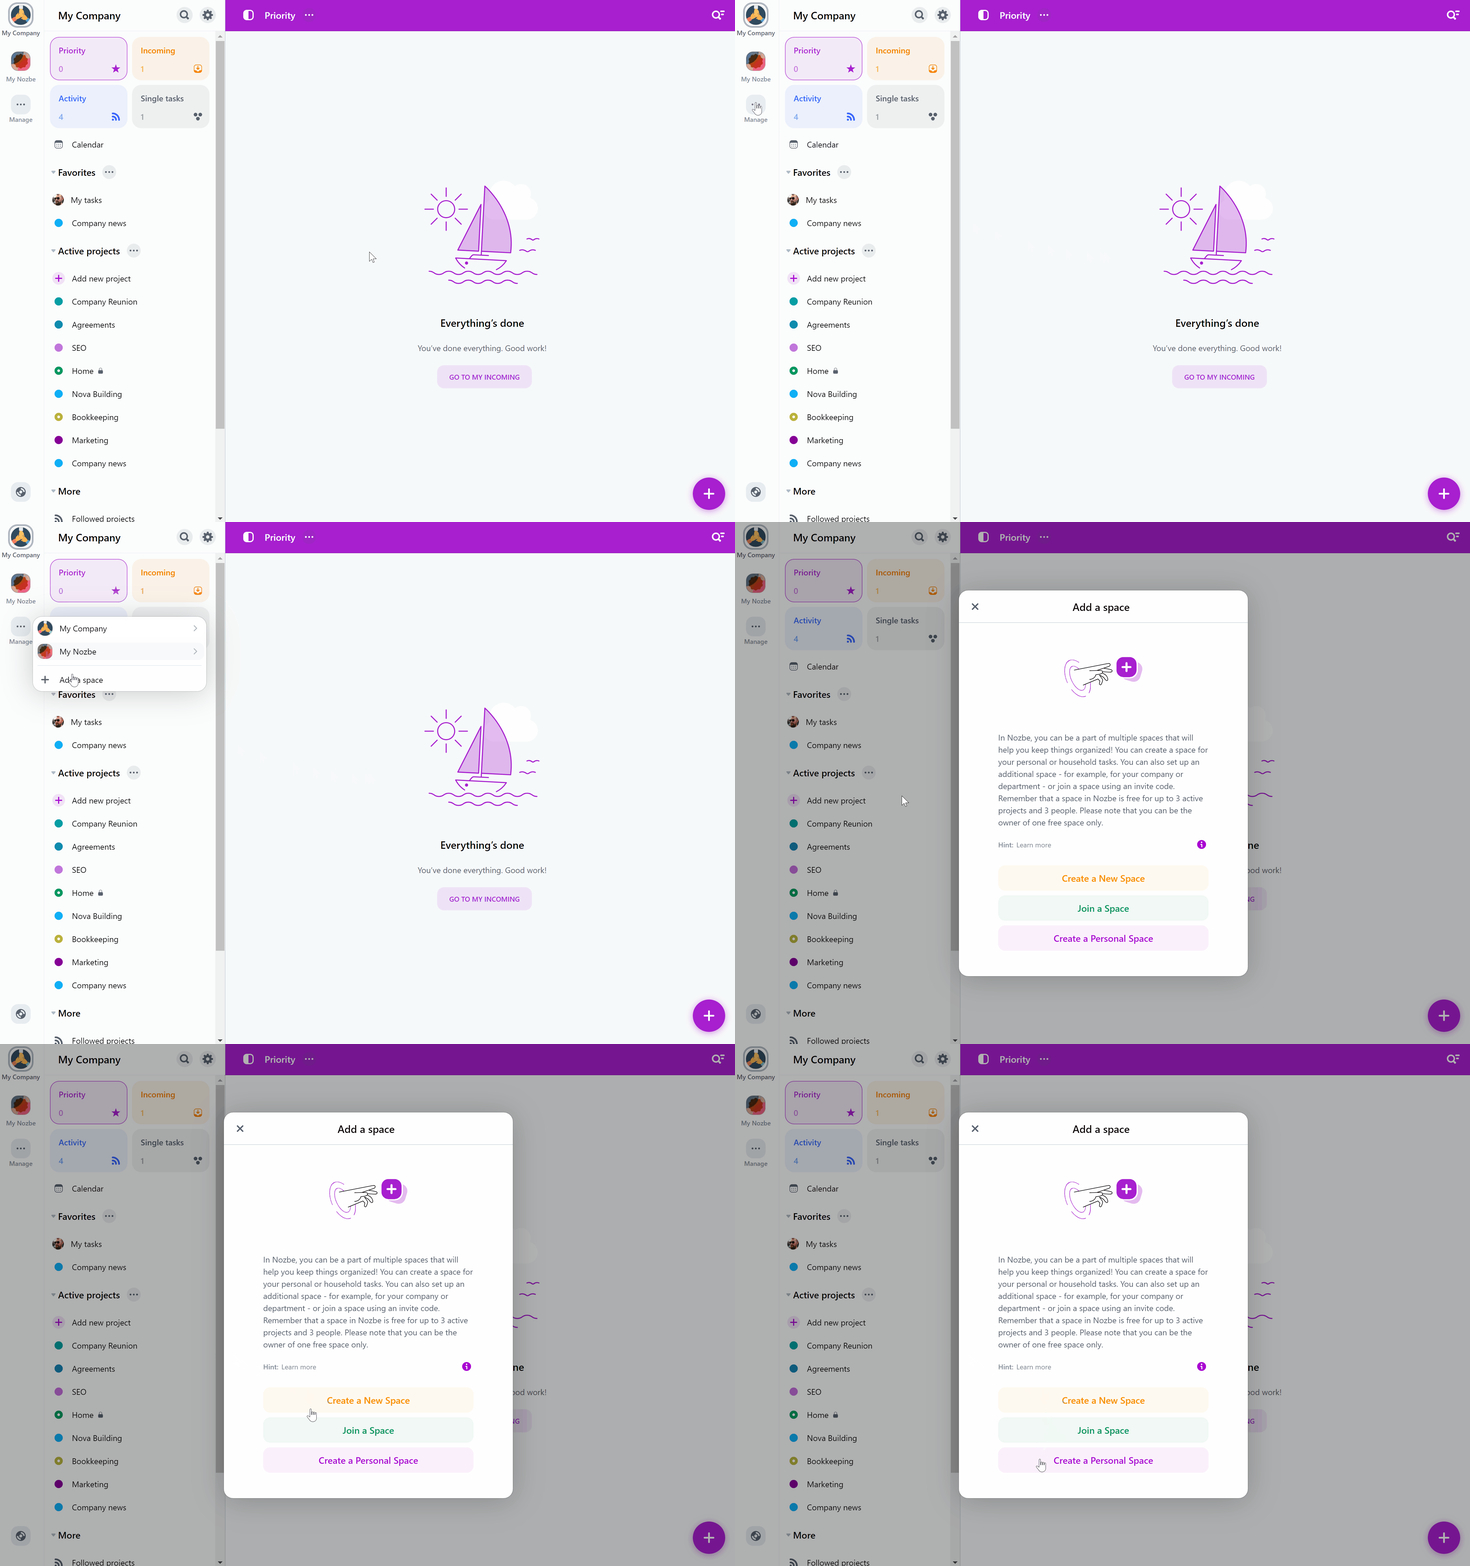
You can see all spaces you created or have access to in the left panel. To switch the space, just click the space icon. If you work in multiple spaces, you can customize each sidebar independently, so your workspace is organized exactly the way you like it.
Default interface
This is the default interface. If you decided to invite people to your space or were invited to one, Nozbe will look like this.
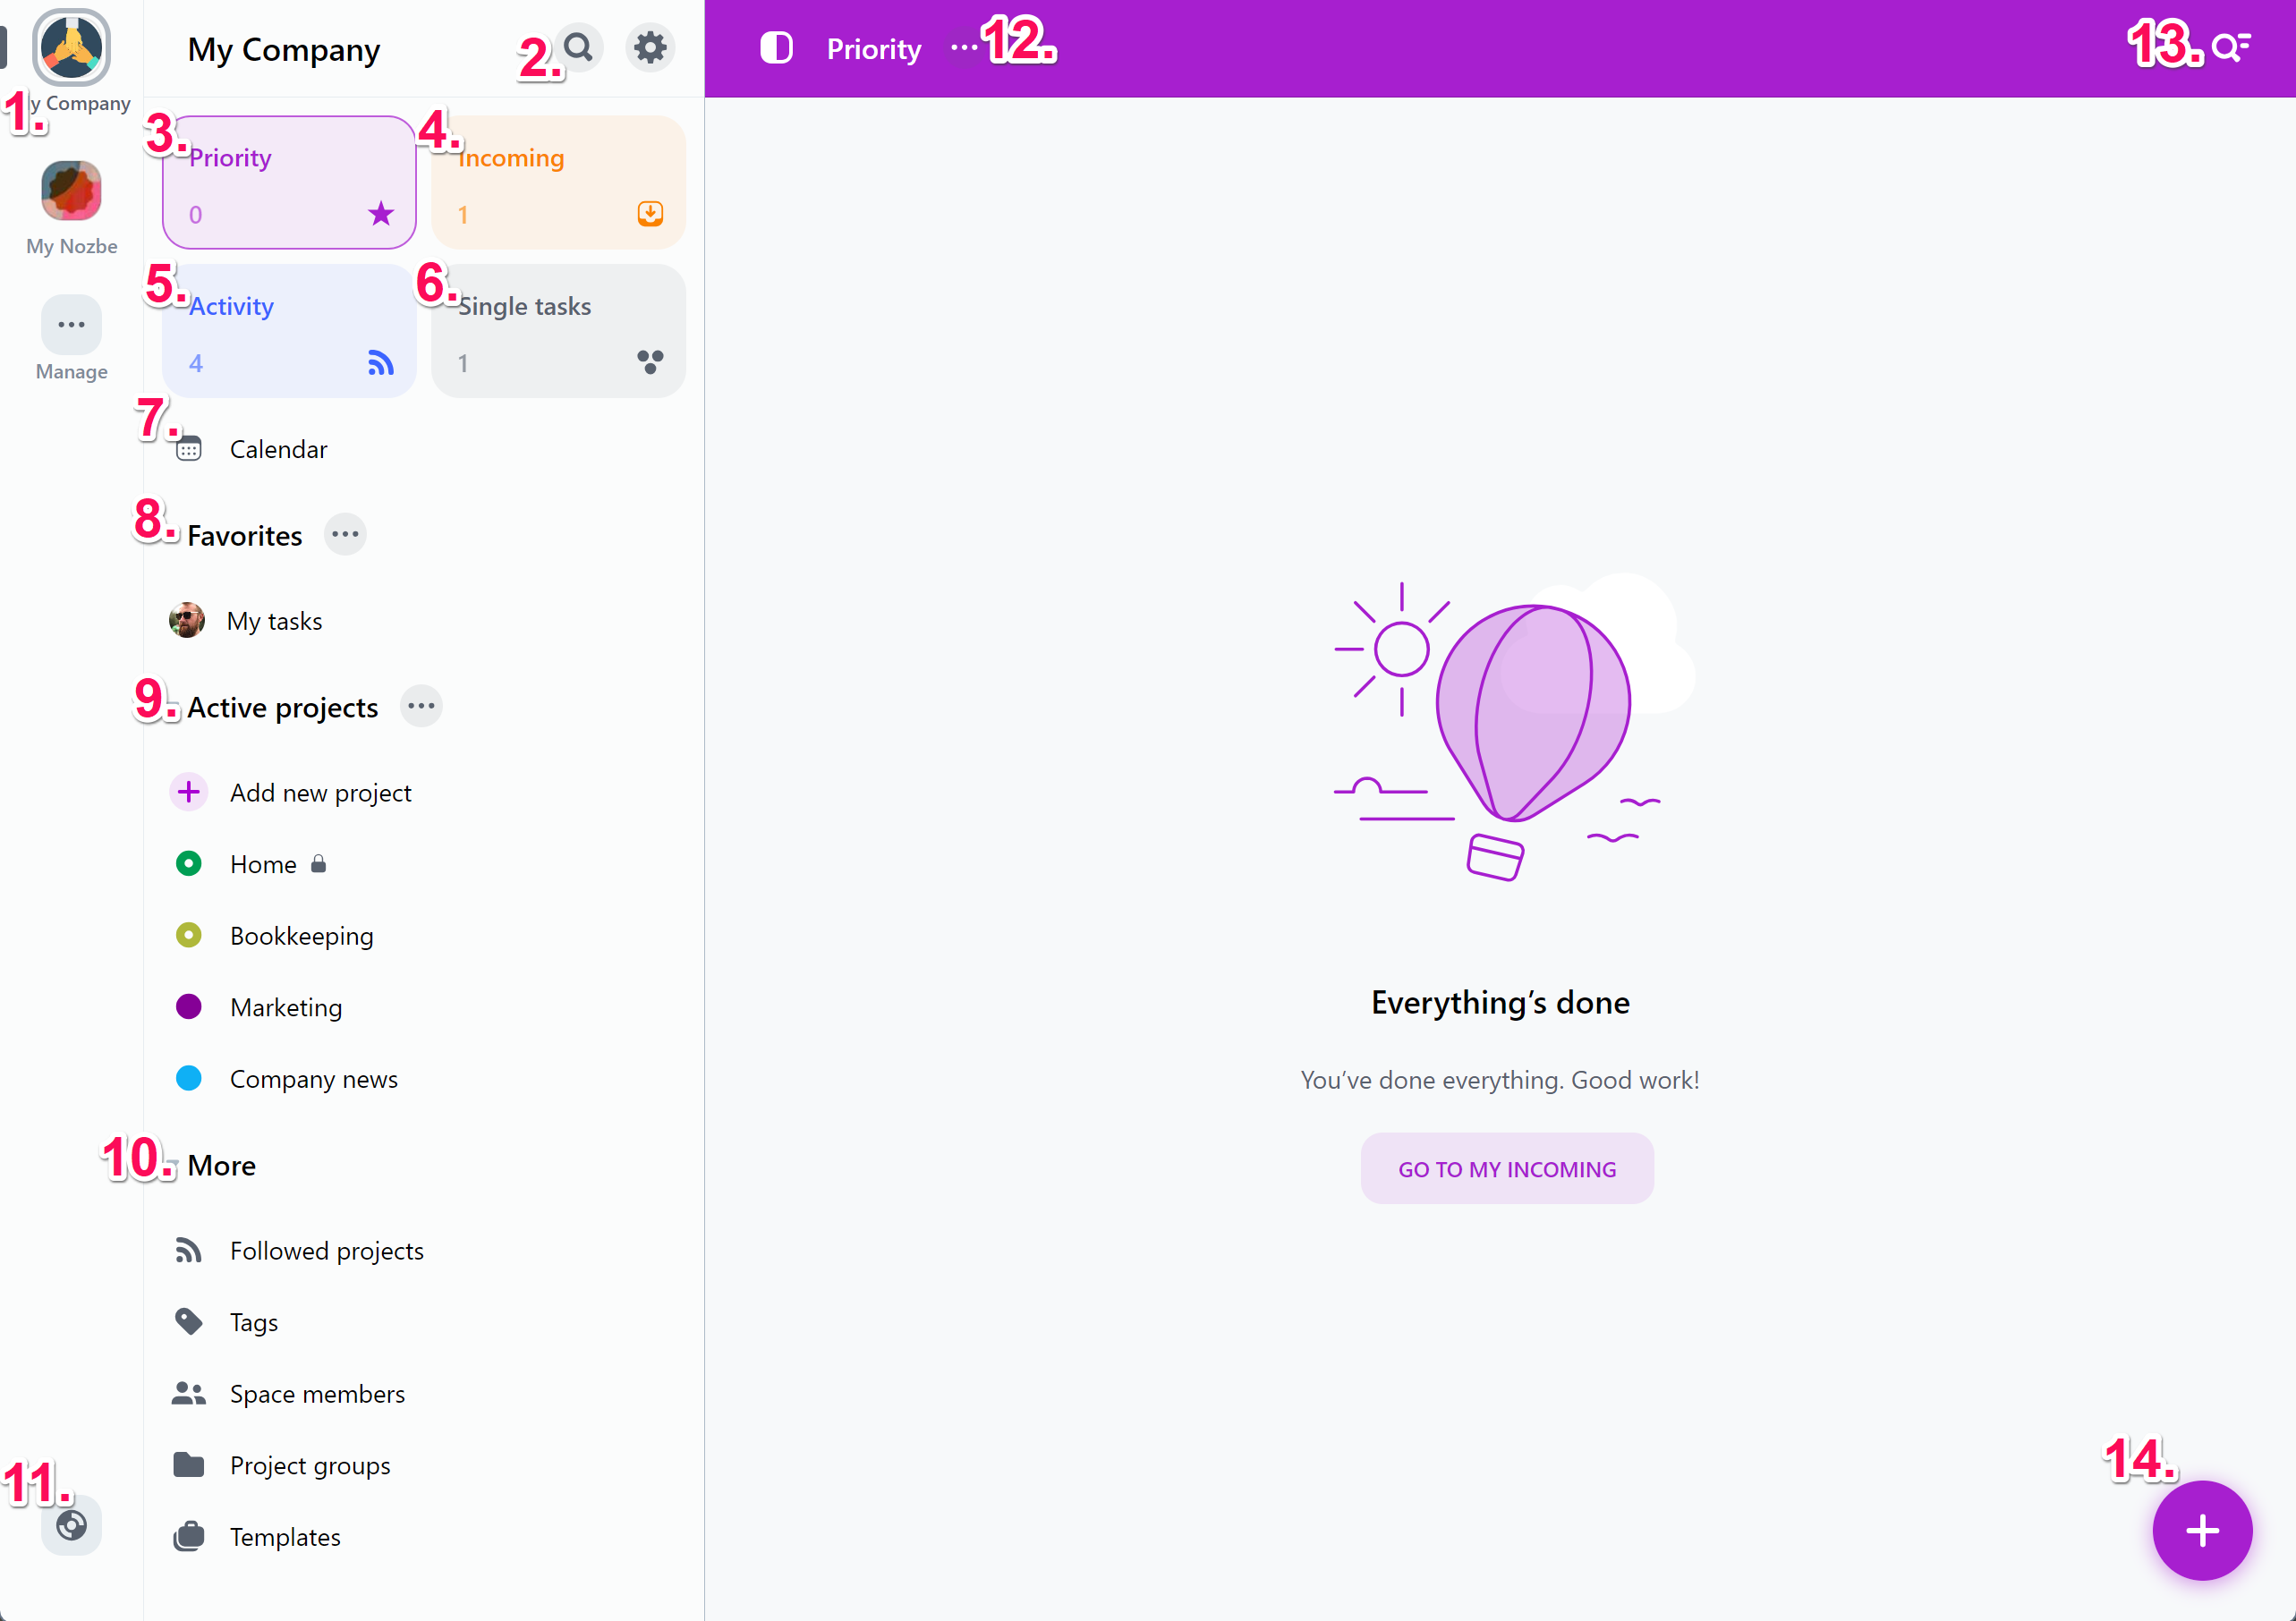
1. SPACES This panel shows you spaces that you own or have been invited to. Tap on a chosen space’s avatar to open the space. Under “Spaces” you can join an existing space or create a new one with the “+ Add a Space” button.
2. SEARCH Type the item you’re searching in this window next to the magnifying glass icon. Here you can look up tasks, projects, people, comments, tags and sections.
3. SETTINGS
Tap on the gear icon to open the main menu. Here you can manage your subscription, access settings, or log out from Nozbe. In Settings, you can edit your profile, change your password and email address, adjust notifications settings, add your vacations, adjust the appearance, enable integrations or email reports.
4. PRIORITY The list of tasks that you consider your priorities; you decide what shows up here by marking tasks with a star. You can also decide which tasks should be prioritized automatically. You can unpin this tile in the Priority view settings ("…" next to the Priority)
5. INCOMING Here you’ll find all the tasks that require your attention: tasks that have been assigned to you, in which you were @mentioned, due and overdue ones, with triggered reminders, as well as tasks added via email or via Quick Add. You decide what to do with them. You can read them and mark them as Reviewed, or you can add a star to them and move them to your Priority list. This view is your control center – visit this view regularly to be up to speed. You can unpin/pin this tile in the Incoming view settings ("…" next to the Incoming)
6. CALENDAR A view that shows you all tasks with a due date set in a form of a calendar. You can unpin this tile in the Calendar view settings ("…" next to the Calendar)
7. SINGLE TASKS Here you can add all the tasks that don’t fit into any other project. By default, only you can see them. You can unpin this tile in the Single tasks view settings ("…" next to the Single tasks)
8. FAVORITES Here you can add your favorite views that you’d like to have quick access to. These could be projects, but also people, tags, or templates.
9. ACTIVE PROJECTS This list shows you all active projects you have access to. Click on a project to open it. Follow it to see it on a “Followed projects” list. You can show this list in your sidebar. To do this use the option “Show in sidebar” in this view settings ("…" next to Active projects). Once not, you’ll find it in the “More” view. You can also pin-unpin this view as a tile (in the Active Projects view settings > “…").
10. MORE
This list contains the views you don’t use a lot and decided not to pin as a tile.

In this view you could have:
- TAGS If this list is not pinned to the sidebar, you will see it here. Use them to group the somehow related tasks from various projects. You can pin this view (Use the “Pin as a tile” options in the All Tags view) or selected tags as a tile (in the tag settings > “Pin as a tile”, to do this.
- MESSAGES If this list is not pinned to the sidebar, you will see it here. This view allows you to communicate with your space members using direct messages. You can pin Messages as a tile.
- FOLLOWED PROJECTS If this list is not pinned to the sidebar, you will see it here. This list contains projects that you decided to follow. Nozbe will notify you about progress made in followed projects in the Activity view.
- PROJECT GROUPS A quick access to groups of similar projects. You can pin this view as a tile (in All projects view > Project groups > Pin as a tile). Or add selected project group to your sidebar (All projects view > “…” next to the group name > “Show in sidebar”. You can also choose to display multiple groups in the sidebar, and change their order there by dragging and dropping them up or down.
- MEMBERS The list of all your team members is always here. Here you’ll see all the people within your space and the projects and tasks they are working on. As a space owner, you can manage your space members in this view. Once you select yourself from the member list, you will find the “Vacation Mode” option, which allows you to inform your colleagues that you are away from work and will not be available for a specified period. You can pin selected team members as a tile. To do this, type on “…” next to the users name and select from the list the “pin as a tile option”
- ACTIVITY Here you’ll find the latest activity from the projects you’re following: new comments, new tasks, reactions to your comments, etc., as well as information about new projects.
- TEMPLATES Here you can create and access project templates. They are useful for handling procedures or recurring projects. Use the “Pin as a tile” option once you use templates a lot.
11. HELP Hit this button to open the help and contact menu. Here you can choose one of a few options:
- “Contact us” - opens a contact form you can use to reach our Customer Support,
- “Help page” - opens our help page containing articles about Nozbe’s features,
- “Keyboard shortcuts” - shows you a list of all keyboard shortcuts available in the app,
- “Show the app tour again” - allows you to learn about Nozbe from our app tour one more time.
12. VIEW’S DETAILS Hit the “…” icon to access current view’s details panel and manage it.
13. MASTER PLUS
Master Plus allows you to add anything you want to Nozbe, anytime, without changing the view.

It is always visible here and allows you to easily:
- Add a task, it opens the “Quick add” view
- Add a project
- Write a message to any teammember
- Add a tag
- Invite new member to your space
14. FILTERS Here you can enable various filters and sorting options, as well as look for specific tasks by filtering that view by name.
15. ADD TASKS Use the “+” button to add new tasks, files, or sections to a current view.
💡 If you decide that you no longer want to work alone and you invite someone to your space in Nozbe, the interface will change to the default one, enabling the previously hidden collaboration features.
Customize your Nozbe
Customize your sidebar, your way. Drag and drop to reorder, pin the views that matter most — projects, tags, teammates, Calendar, Messages, Active Projects, or Templates — and move the rest out of sight.
Existing accounts: If you haven’t touched pinning/unpinning yet, you’ll automatically get the new default tile layout after migration.
Adjust the interface
You can also personalize each tile’s color using the “…” menu next to its name — the chosen color is applied consistently across the entire app: tiles, headers, icons, and UI elements.
Prefer a cleaner look? Enable Minimalist Tiles in appearance settings to color only the icon, keeping the tile itself neutral. Available on web and desktop apps.
Collapsing lists
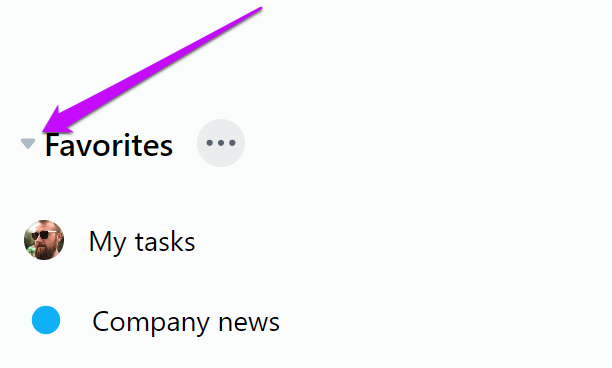
You can collapse or minimize all the lists (Favorites, Active Projects, Followed Projects, and More). To do so, use the up/down arrow visible on the right side of the group name.
Hiding the app’s main panel
If you want to hide the app’s main panel, you can do so by tapping on the icon visible on the left of the view’s name:

Vacation mode
Vacation mode - how does it work?
Vacation mode in Nozbe allows you to inform your colleagues that you are away from work and will not be available for a certain period of time. It’s a simple tool that helps avoid misunderstandings and improves team collaboration.
What happens when you enable vacation mode?
• Your notifications will be paused until your return date. • Co-workers will see the information that you are on leave until {date}:
- When they want to assign you a task,
- Mention you in a comment,
- Or check your profile.
You will not receive any reminders or push notifications while you are on leave. You will also not receive email reports.
You need to set a vacation separately in each of your spaces. If you are on the Business plan, you can apply it to all spaces in the organization.
How do I set a vacation?
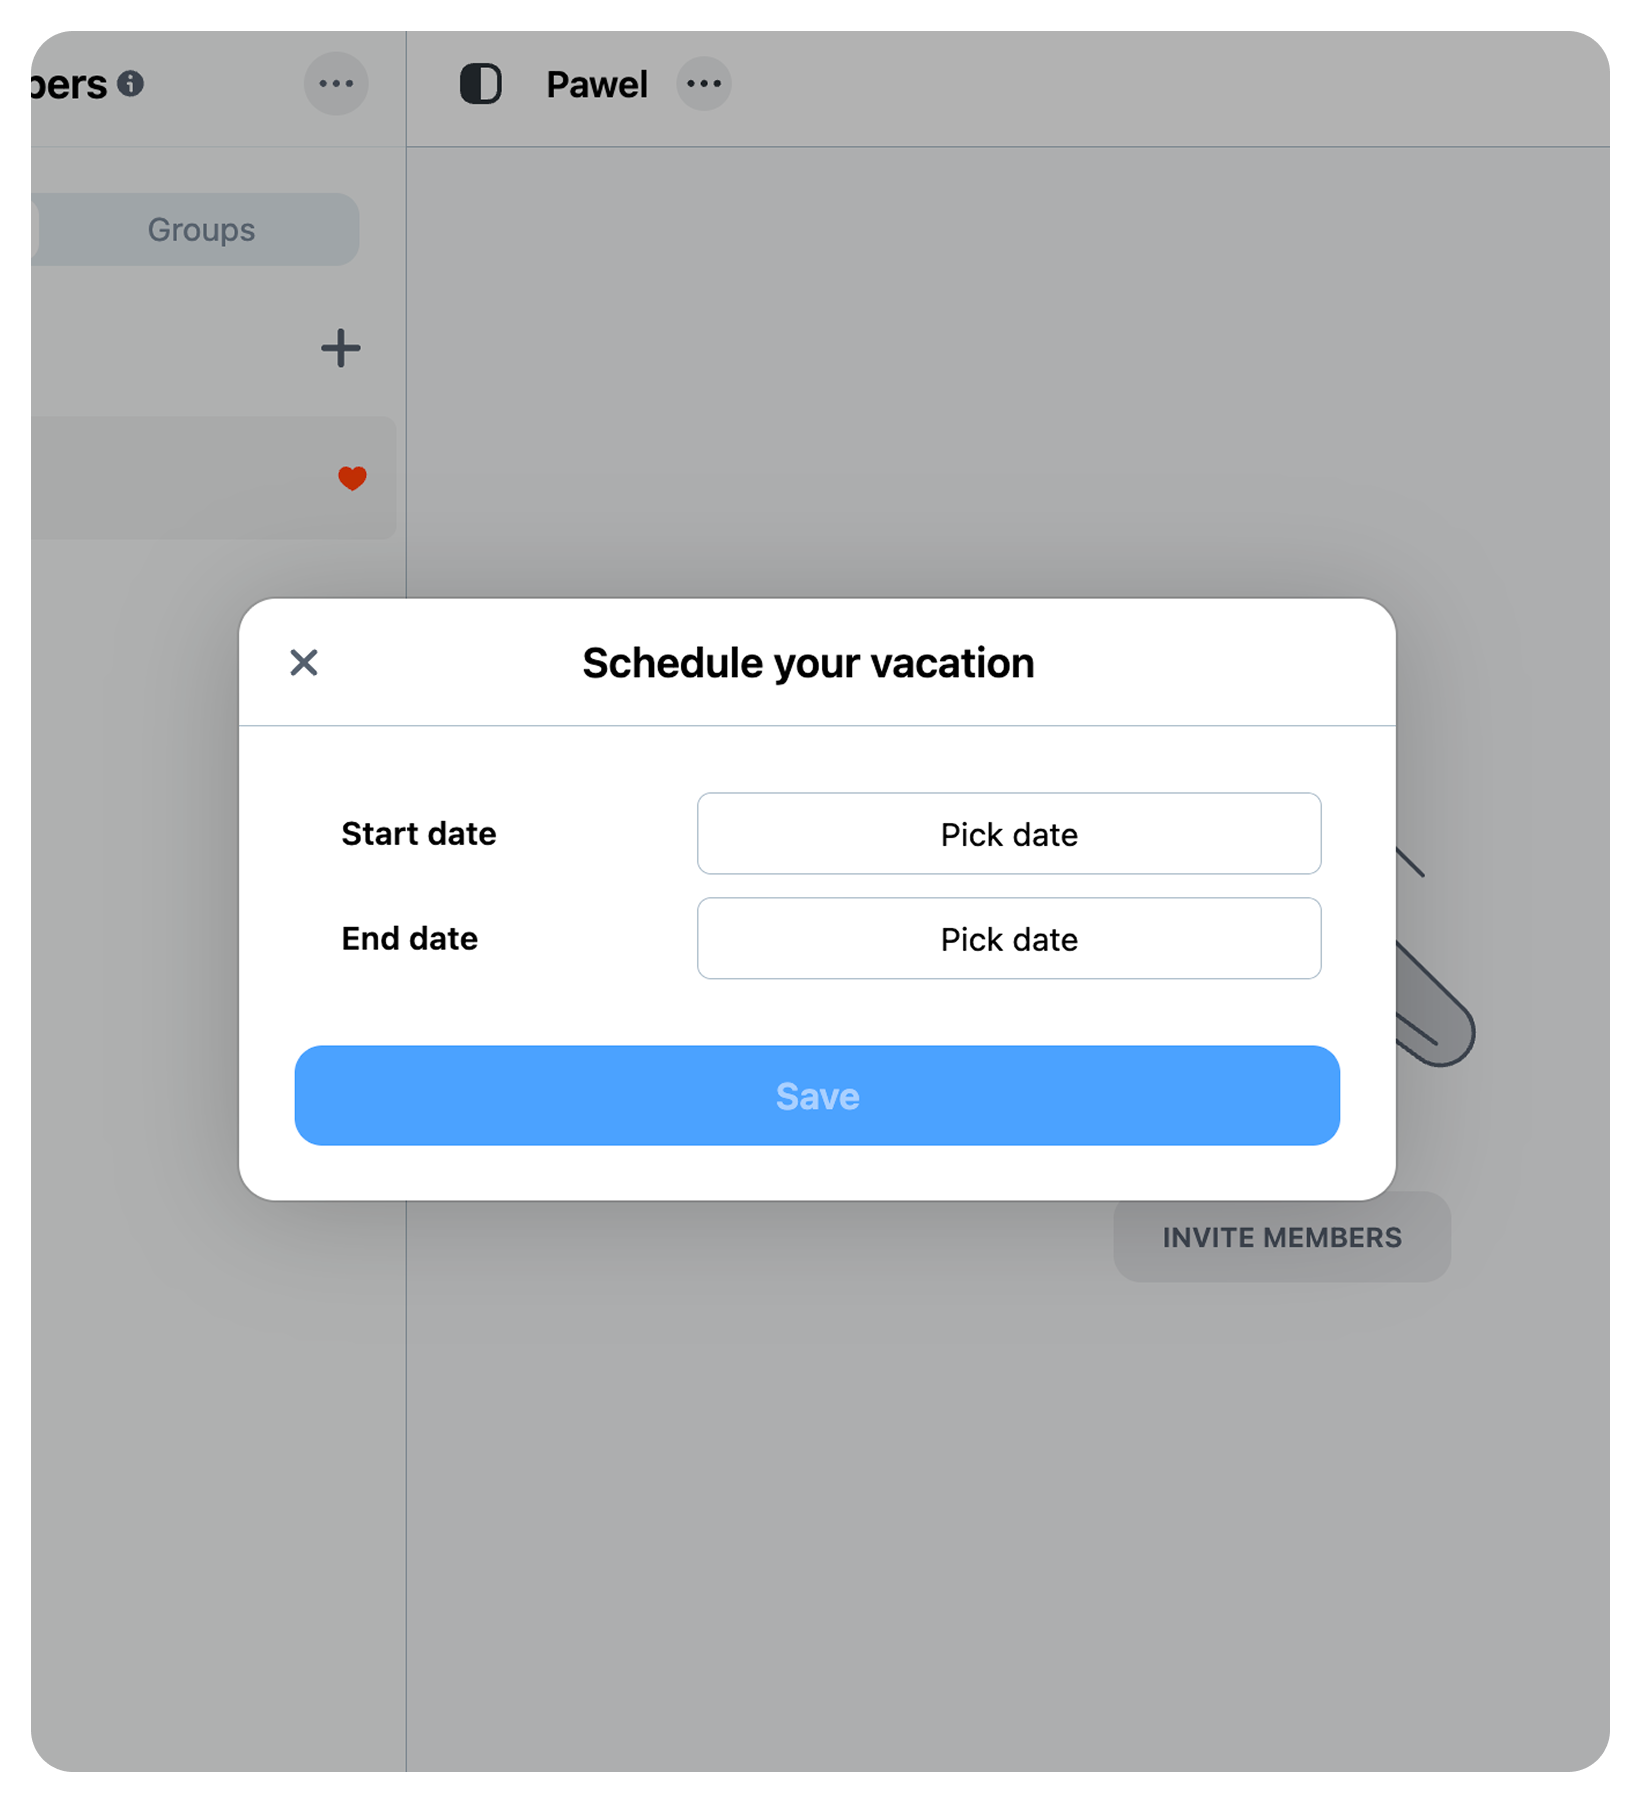
- Click “Members” in the sidebar and open your profile (… next to your name)
- Select the Holidays / Vacation mode section.
- Specify the start and end dates.
- Save - done!
Important:
Vacation mode does not hide you from the team - others can still view your tasks. You can edit or cancel your vacation at any time. If you schedule a vacation at a time when others are also absent, the app will let you know.