Email tasks
- Emailing tasks to Nozbe
- Sending tasks to a specific project
- Sending tasks to a specific section
- Sending comments to a specific task
- Sending multiple tasks at once
- Use hashtags to set parameters
- Quick open and reply links
- Trick: How to add your task to the bottom of the list
- Trick: How to add your task as a priority
Emailing tasks to Nozbe
One of the most valuable features is to email tasks and attachments to Nozbe. All you need to do is activate this option.
Activating adding tasks via email
To do so, open the Settings window, and tap on “Add tasks via email” option. It will be instantly activated, and you will see your automatically generated email address. You can copy it to the clipboard.

If you own more than one space, Nozbe will create separate addresses for each of your spaces.
How to send tasks via email
To send the first task, you need to go to your email client. Open a new message, and paste the copied address.
The email’s subject line will be your task name. The text you add in the body of the email will become your task’s comment. All the email attachments will be added to the comment as well.
If you don’t want to forward the whole email, use ~~ (double tilde) or -- (double hyphen) above the text you don’t want to send. Nozbe will ignore the remaining part of the message, and it won’t be visible in the newly added task.
Sending tasks to a specific project
If you don’t add the specific destination, your email will appear in your Single Tasks and Incoming views.
If you want to send a task to a specific project, you need to go to that project, hit the “…” icon next to its name, and choose the “Add task via email” option.
That’s it! You get the email address you have to use to send your tasks to that project.
You can also add a task to a specific project by sending it to your general Nozbe email address. To do this, add a hashtag with the project name to the email’s title. Add it after the task’s name for it to work.
Sending tasks to a specific section
Sending a task to a specific section works similarily to sending a task to a chosen project.
Tap on the “…” icon next to a section’s name and choose “Add tasks via email” to generate a unique email address.
Sending comments to a specific task
You can also forward an email to add it as a comment to a specific task.
Tap on the task, then hit the “…” icon in the upper-right corner of the task details view. Use the “Add comments via email” option to generate a unique email address.

Sending multiple tasks at once
You can email as many tasks to Nozbe as you want to at once. Send them to your unique Nozbe email address.
You don’t need to write anything in the email’s title. In the email’s body, start each task in a new line, with a dot and a space - like this:
. My first task
. My second task
. My third task
You can use #hashtags to define the tasks' parameters, such as project, section (available only if you specified a project in the first place), responsible person, due date, recurrence, reminders, tags, and priority.
Add the hashtags after your task’s name, seperating each one with a space. Here’s an example:
. Prepare a presentation #Work project #John #May 14 9:00 pm
If you want to add a comment to your task, write it down in a new line below that task. Here you can also use @mentions:
. Prepare a presentation #Marketing #John #May 14 9:00 pm
Hi @John, could you help me with this task?
You can also add attachments to your email. These attachments will be added to the first task on the list.
Here’s what an example email with multiple tasks, hashtags and attachments looks like:
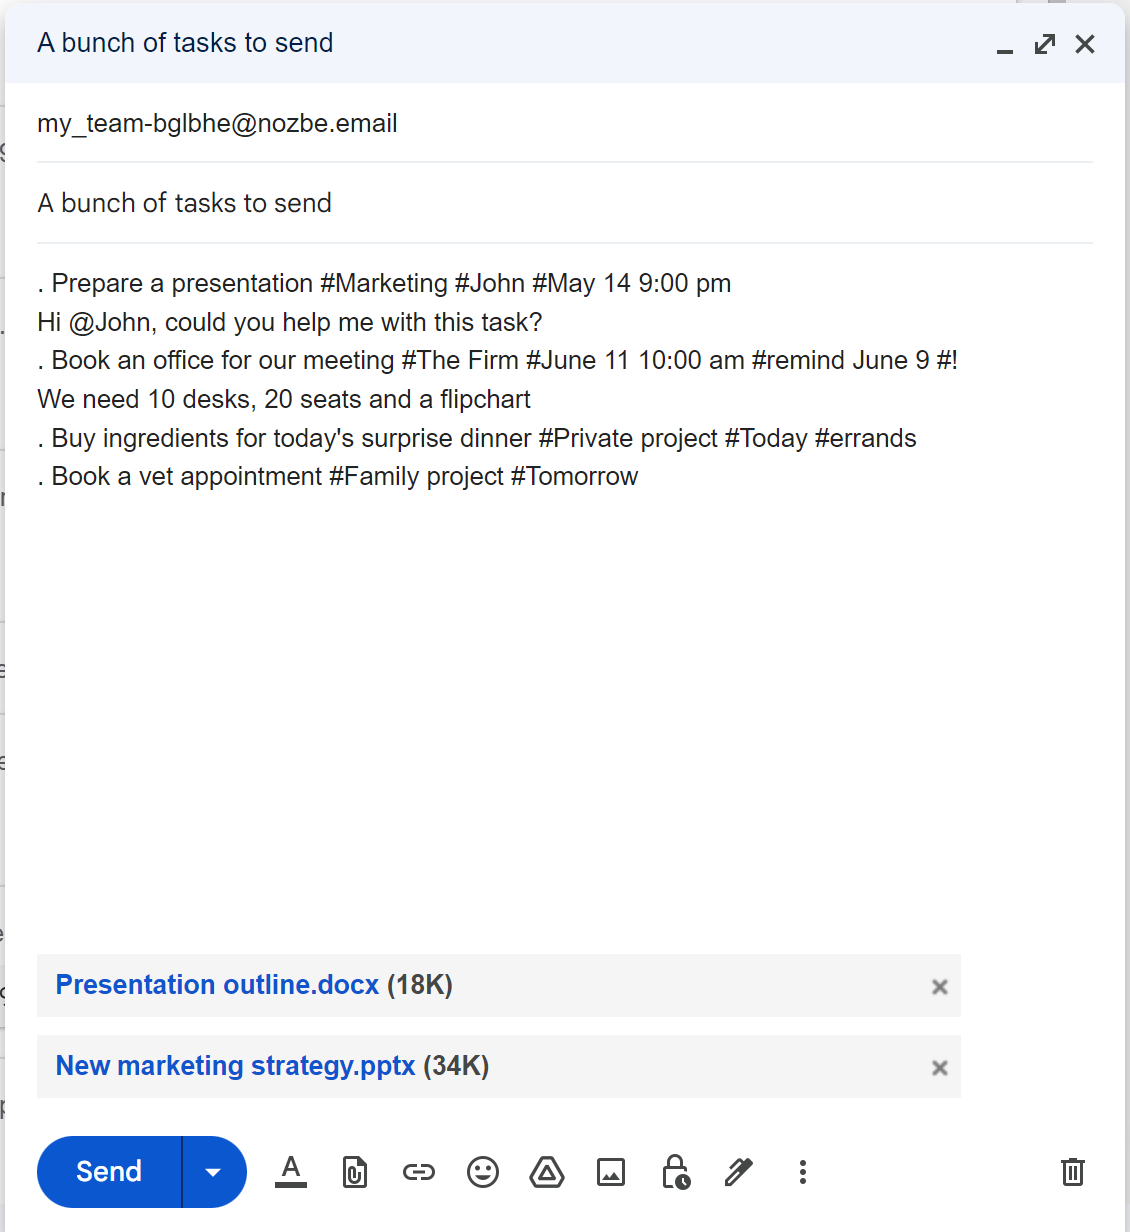
If you didn’t specify a project using #hashtags or use the unique project email address, all of those tasks will be sent to your Single Tasks.
All tasks sent by you via email will be assigned to you, unless you assign the task to someone else using a #hashtag.
They will also show up in your Incoming, in the “Recently added” section.
Use hashtags to set parameters
You can use hashtags to specify the parameters of a newly added task. Type # and a parameter right after it in the email subject.
The list of available hashtags:
- #project name
- #project section name (works only if a hashtag with a #project name is provided as well)
- #tag name
- #responsible person
- #every …
- #remind {day of a week, month} [day of a month] [time]
- #{day of a week, month} [day of a month] [time]
- #! is for priority
Do you want to set up an exact date, e.g., a day or a specific hour? Here you will find a few examples of how to do this:
- #friday → closest friday
- #today → today
- #tomorrow → tomorrow
- #february → date will be set to February 1st
- #february 11 → date will be set to February 11th
- #february 11 11:11pm → date will be set to February 11th, and time to 23:11
- #february 11 11:11 → date will be set to February 11th, and time to 11:11 (am)
If you define the day, but don’t define the hour, then time will be set to midnight by default.
The order of hashtags is not important.
You don’t have to write the whole project/section/tag/user name. The system will recognize the correct parameter if you type the first three letters. The name has to be unique so that the system can distinguish it.
Quick open and reply links
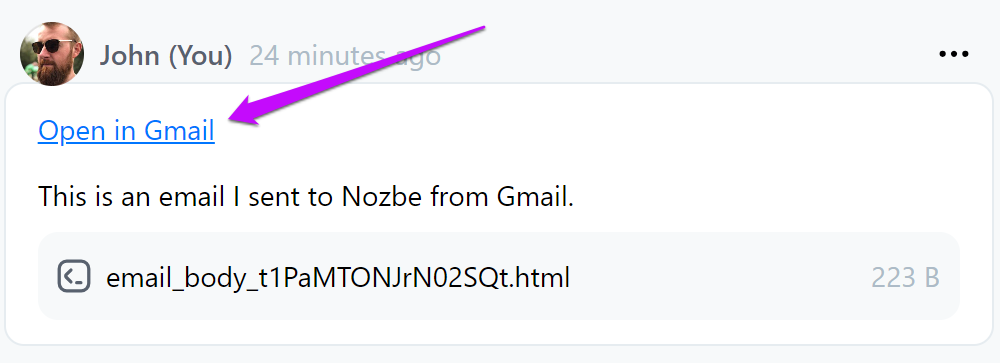
When you send an email to Nozbe using Gmail or Apple Mail, Nozbe will recognize the app you used to send your email from. It will add an “Open in Gmail” / “Open in Mail app” hyperlink to the newly added comment. You can use that link to open the original email in your mail app.
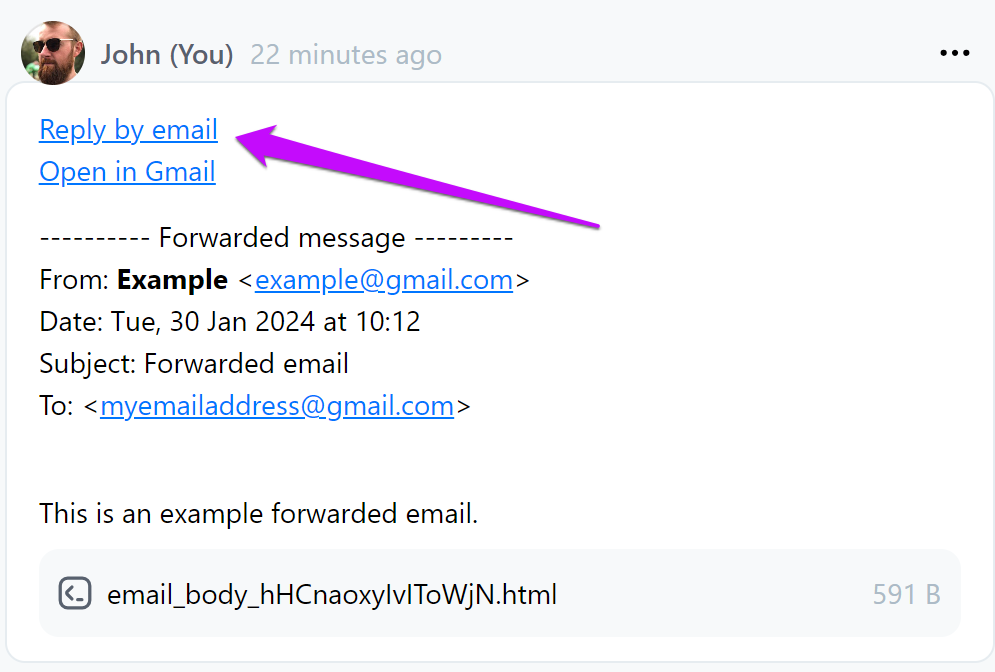
If you forward an email to Nozbe that was sent to you by someone else, you’ll also see a “Reply by email” link in the newly added comment. When you click on it, you’ll be able to reply to that email in your mail app.
These features only work for emails sent to Nozbe using Gmail and Apple Mail.
Trick: How to add your task to the bottom of the list
You can also add your task to the bottom of the list. First, you need to generate an email address for your section or project. Then, you add .down just before @ sign.
For example, if your address is ahjxah.rv5hfm@nozbe.email, it will look like this:
ahjxah.rv5hfm.down@nozbe.email
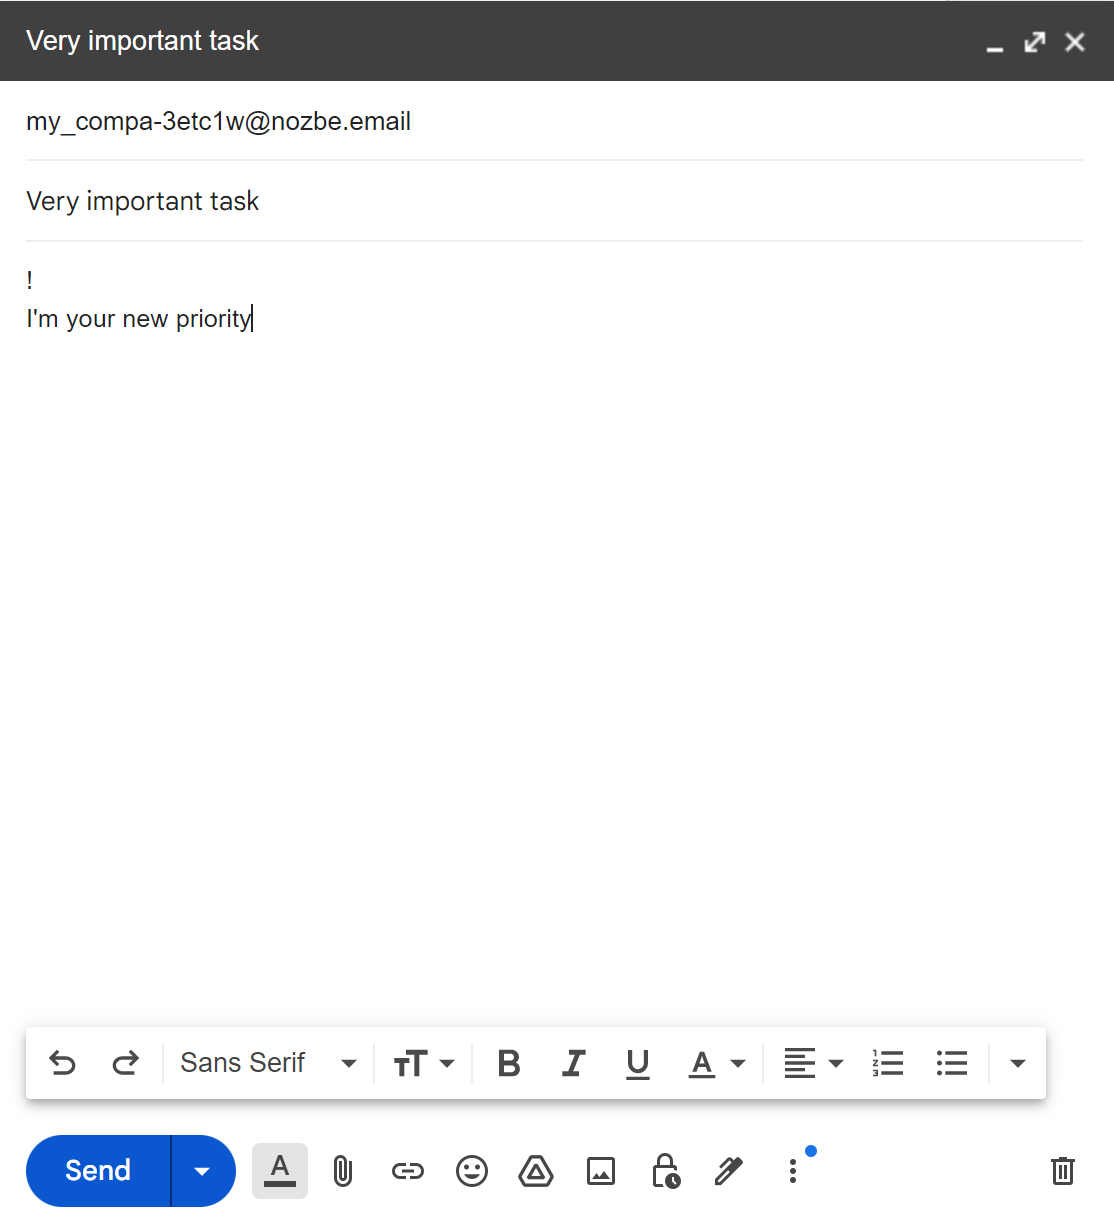
Trick: How to add your task as a priority
It’s a helpful trick if you need to add a task to your Priority.
Add ! in the first line of your email body, and that’s it! Your task will appear as your Priority.